Anterior Cervical Discectomy and Fusion (ACDF)
By: Adapted from eGuidelines+ by Emily McKisson, MS, BSN, RN, CNOR
Published: 3/22/2024
Indications for Procedure
An anterior cervical discectomy and fusion (ACDF) is typically indicated for patients who have a cervical disc herniation or cervical spondylosis (ie, degenerative disc disease in the cervical spine). These patients often experience neurologic symptoms that can significantly impact their quality of life, ranging from pain to numbness and tingling in the upper extremities. Surgical intervention becomes necessary when these symptoms persist or if the cervical spine becomes unstable.
Patient Assessment
- Review past surgical history involving any head or neck procedures, including assessment of range of motion in the patient’s head and neck. Significant findings should be discussed with the anesthesia care team in collaboration with the surgeon to ensure appropriate considerations are taken for positioning the patient.
- Review past medical history of any neurologic deficits, such as a transient ischemic attack (TIA) or stroke.
- Assessment of symptoms:
- Most patients will present with unilateral symptoms that correlate with the side of the disease or structural malformation. Note: The primary surgeon will stand on the affected side when performing the procedure and the assistant will stand across from them.
Patient Positioning
Properly positioning the surgical patient for an ACDF is essential for the patient’s safety and the success of the procedure. The coordinated efforts of the surgical and anesthesia teams are vital to achieving the desired position while prioritizing the patient's well-being.
Supine Positioning
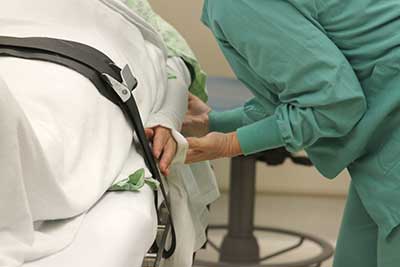
The patient is initially assisted into the supine position (ie, lying on their back) on the OR bed.
Head and Neck Positioning
- After the patient is under anesthesia, the patient’s neck is extended to expose the cervical spine area for access to the surgical site. Neck extension can be achieved by one of two methods:
- A gel headrest may be used to gently extend the patient’s neck while providing support and comfort and exposing the surgical site.
- Alternatively, a weighted traction system can be employed to carefully extend the patient’s neck. This method involves applying controlled force to elongate the neck.
- The manipulation of the patient’s neck requires at least three team members; typically, the perioperative nurse, a member of the anesthesia care team, and a member of the surgical team. Positioning is a delicate process with the potential for injury.
Shoulder and Arm Positioning
- The patient’s arms are typically tucked at their sides to allow the surgical team to be closer to the OR bed for adequate access to the surgical site.
- A shoulder roll may be strategically placed under the patient’s upper back and shoulders to enhance exposure of the patient’s neck.
- Silk tape may be used to gently move the shoulders downward, further exposing the neck area and optimizing the surgical field.

X-ray Confirmation
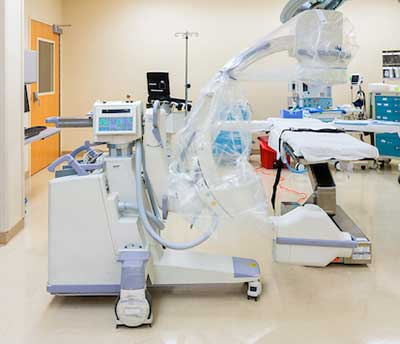
X-rays are often required to confirm the specific spinal level during the procedure. Therefore, the OR bed should be configured to allow easy access for either a flat plate x-ray machine or a fluoroscopy unit (ie, C-arm) to reach the patient’s neck area.

Surgical Prep
Patients undergoing an ACDF typically require endotracheal intubation, which can increase the risk of airway fires when skin prep solutions containing alcohol are used. To minimize this risk, it is essential to adhere to the manufacturer’s instructions for use when selecting and applying the appropriate skin prep solution. Steps to mitigate the risks of patient harm include the following:
- Choose the right applicator: Select a small applicator size, such as a 10.5 mL applicator instead of a 26 mL applicator, to reduce the amount of alcohol-based prep solution applied to the patient’s skin, which will in turn reduce the fire potential.
- Use sterile towels: Place sterile towels bilaterally under the patient’s neck to capture any runoff from the alcohol-based prep solutions. This helps prevent excess solution from accumulating around the surgical area.
- Adhere to dry times: Follow the manufacturer-recommended drying time for the chosen skin prep solution. Ensuring the skin is thoroughly dry before proceeding with any surgical steps is crucial for minimizing the risk of fire.
- Consider nonflammable alternatives: Betadine solutions, which are nonflammable, can be a suitable alternative to alcohol-based skin prep solutions. Use sterile towels bilaterally under the patient’s neck to prevent pooling under the patient's skin, which can lead to skin irritation.
Supplies and Equipment
Equipment
- Monopolar electrosurgical unit (Bovie)
- Bipolar electrosurgical unit (irrigating or non-irrigating per the surgeon’s preference)
- High-speed pneumatic surgical drill
- Neurologic monitoring devices
- Note: A separate team places neurologic probes to allow the surgical provider to monitor real-time nerve responses. When nerve responses are measured for head or neck procedures, the perioperative nurse should anticipate the need for a bite block and mark this on the count board or mark this during team communication to reduce the risk for inadvertent swallowing during extubation.
- Microscope
- Lower-body warming device
- Sequential compression device
Suture
- 2-0 absorbable sutures for the muscle layers
- 4-0 absorbable sutures for the subcutaneous layer
Dressing
- Self-adhesive wound approximating strips (eg, Steri-strips) or liquid adhesive
- If additional dressing is needed, select a transparent dressing to allow postoperative providers to check the surgical site for bleeding without having to remove the dressing.
Procedure
- Exposure of the surgical location: The surgeon will make a small incision on the patient’s neck using a #10 blade knife. After the incision is made, the surgeon will use monopolar electrocautery or Metzenbaum scissors to dissect through the muscle down to the vertebral level. The surgeon will use small handheld retractors (eg, Cloward, small Richardson, Army/Navy) to help with visualization.
- After exposure of the vertebral bodies, the surgeon will insert an 18- or 20-gauge spinal needle into the disc space. A lateral x-ray will be used to confirm the spinal level and the correct location of surgical intervention.
- Removal of disc contents: After the spinal levels are confirmed, the surgeon will switch to a self-retaining retractor (eg, Trim Line, Gelpi) and use a #11 blade knife and possibly a vertebral spreader to open the disc space. They will then use a pituitary rongeur or small Kerrison to remove the contents.
- Replacement of disc space: The surgeon will use a depth gauge and caliper to measure the interbody deficit and then replace the deficit with vendor-supported hardware, such as a cage device, plate, or screws, or with a bone graft based on the surgeon’s preference.
- Closure: After a lateral x-ray confirms the placement of the implants, the surgical team will typically use hemostatic agents to dry the surgical site before closing the muscle layers with 2-0 absorbable sutures. The subcutaneous layers will be closed with 4-0 sutures. Steri-strips or liquid adhesives may be used to close the skin.
Complications
- Bleeding at the surgical site causing an airway obstruction
- Difficulty swallowing
- Neck pain
- Impaired mobility related to surgical positioning
- Infection
Postoperative Considerations
- Document the patient’s preoperative neurological status and symptoms in the perioperative record and relay this information when performing the hand off with the postoperative nurse.
- Place a neck brace if indicated.
Editor's notes: This content is adapted from AORN eGuidelines+. If your facility subscribes to eGuidelines+, you can access the full content. This article is intended to serve as a guide to prepping and may not represent every available antiseptic solution. Always prep in accordance with the manufacturer’s instructions for use for the antiseptic solution being used. AORN does not endorse any commercial company’s products or services, including particular skin preparation products. Inclusion of a solution in this article does not constitute an endorsement by AORN of the quality or value of such solution or process, or of the claims made by its manufacturer.
STERI-STRIP is a registered trademark of 3M Company, St. Paul, MN. MIDAS REX is a registered trademark of Medtronic Inc, Minneapolis, MN. AORN does not endorse any commercial company’s products or services. Inclusion or exclusion of products in this article does not constitute an endorsement or review (implied or otherwise) by AORN of the quality or value of such products, or of the claims made by the manufacturer.
AORN Resources
If your facility subscribes to eGuidelines+, you can access:
- Positioning At a Glance | AORN eGuidelines+
- Skin Prep at a Glance | AORN eGuidelines+
- Instruments at a Glance | AORN eGuidelines+
- Procedures at a Glance | AORN eGuidelines+
- Room Setup at a Glance | AORN eGuidelines+
- Patient Skin Antisepsis Guideline | AORN eGuidelines+
- Positioning the Patient Guideline | AORN eGuidelines+

