CRNAs Focus on Staff Wellness and Patient Safety
The American Association of Nurse Anesthesiology (AANA) has joined the ALL IN: Wellbeing First for Healthcare coalition, saying the group’s initiative to improve the...
This website uses cookies. to enhance your browsing experience, serve personalized ads or content, and analyze our traffic. By clicking “Accept & Close”, you consent to our use of cookies. Read our Privacy Policy to learn more.
By: Brandi Cunningham
Published: 3/1/2019
Before we discuss how to design and outfit your facility for ENT surgery, just a quick word about how the first physician-owned ambulatory surgical center in North Carolina specifically designed for patients requiring ENT surgery came to be.
In 2010, North Carolina launched a statewide project to determine if single-specialty surgery centers increased patient access to certain surgical sub-specialties. For our ENT docs, the timing was perfect. The local hospital rarely scheduled their cases during their preferred block times. Granted, ENT wasn’t the hospital’s biggest revenue-generator, but the physicians of Piedmont Ear, Nose & Throat Associates (PENTA) were growing increasingly annoyed (PENTA-up frustration!).
As they say, necessity is the mother of invention. Our surgeons jumped at the chance to show that that a smartly built facility can improve patient care and broke ground on the 9,849-square-foot, 2-room Piedmont Outpatient Surgery Center. Since performing our first case in February 2012, 3,000 patients have come through the facility’s ORs each year. Our current success can be traced back to before the center’s doors opened, when we focused on designing and outfitting a facility that would set us up for future growth and innovation.
We began the planning process with a construction budget of $4.1 million, with around $1 million earmarked for equipment. Because the construction process is so time-consuming, there’s a tendency to jump in before you’ve accounted for each and every cost consideration that could crop up. That’s a mistake. Double- and triple-check every aspect of your budgeting and add some padding to account for inevitable and unforeseen oversights — the medical gas line that needs to be rerouted mid-project or the electrical wiring issue that needs to be sorted out — before moving forward.
Equipment purchasing is where you have the most wiggle room — and where a clinical perspective is paramount. In the early stages of our construction, an administrator with no clinical experience listed the wrong-sized sterilizers on the budget. The estimate was off by thousands: $6,000 compared to the $30,000 that we actually needed to spend.
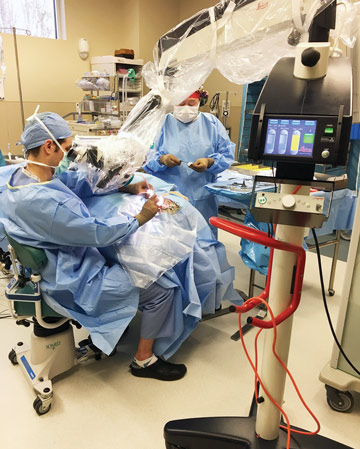
To outfit for an ENT, you’ll need to invest in surgical microscopes. Depending on your needs and the complexity of your cases, the price could vary greatly — from $25,000 to $40,000 for basic microscopes used during basic procedures such as myringotomies to $100,000 for high-optic microscopes needed to place cochlear implants and perform mastoidectomies. We ultimately paid $75,000 for 2 microscopes. One was a higher-end model, but because nearly 60% of our procedures are ear tube cases for pediatric patients, we bought a more basic model for the second OR.
Image guidance is developing into the standard of care for ENT surgery. It’s one more tool that helps increase the accuracy and safety of procedures when anatomical landmarks are distorted by disease. When we first opened and didn’t have an image guidance system, our physicians were performing image-guided sinus procedures at a local hospital-owned outpatient center. It begged the question, “How many cases are we sending away and how much revenue are we losing?”
That prompted me to run a cost-analysis on purchasing an image-guided system, which run about $135,000 to $150,000, depending on the instruments and options purchased. My calculations showed we could pay off the system we purchased by performing 38 image-guided cases within a year. We actually wound up performing 78 cases and paid it off sooner.
The system, which creates 3D imaging by overlaying 3 different 2D images from a patient’s pre-op CT scans, provides real-time clinical mapping of sinus cavities to help physicians navigate their instruments through the sinuses. It also has disposable trackers that surgeons can attach to their preferred instrumentation.
We focused on efficiency when planning the facility, and that attention to detail is evident in the final design. The U-shaped layout of the building was created for maximum patient flow and minimal staff excursion.
It’s only about 5 steps from pre-op to the ORs, which each measure about 480 square feet. Because we don’t have a lot of extra storage space — not to mention time between cases — the ORs are big enough to house all the equipment we need for cases. Each OR’s set-up is standardized, which speeds turnover times and limits our need to move equipment into and out of the rooms. We also added modular cabinets for extra storage capacity. Those features are a big part of why our average OR turnover time is just 7 to 9 minutes.
After surgery, patients are moved another 5 steps to PACU. The pre-op and post-op rooms were designed exactly the same way to accommodate overflow during busy days. The rooms can be used interchangeably, so we avoid scheduling problems.
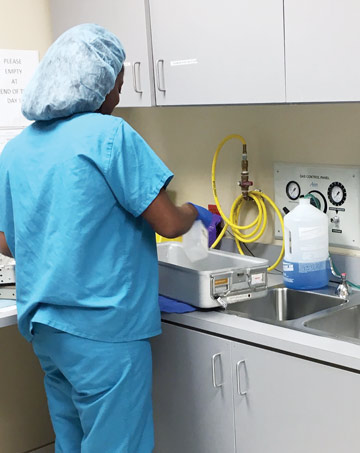
The sterile processing area is located between the ORs (in the middle of the U). Locating sterile processing between the ORs improves efficiencies in several ways: It takes little time to drop off and pick up instruments, the reprocessing staff is readily available to address issues that might arise and there is continual and open communication among scrub techs and reprocessing techs.
The facility’s design ensures staff take minimal steps to hand off patients as they move from pre-op to the OR and to PACU. Plus, with the departments being so close, staff can easily step into another area to help out when necessary.
To increase patient satisfaction, we built a main waiting room where patients check in before surgery, but also included a separate, smaller area where family members can wait while their loved ones are in surgery. The private space provides the families with a more peaceful environment with less foot traffic.
Breaking ground on a new facility involves complying with complex state regulatory burdens that are often difficult to understand and time-consuming to manage. You can access all the information you need to make sure your construction project is done by the book, but interpreting the regulations is the tough part. Our team went to accreditation seminars, made endless phone calls to experts and spent hours creating and maintaining all of the mandatory records.
If you do decide to take on managing regulations, make sure the point person has clinical experience. After all, there’s a big difference between understanding how a regulation works in theory and complying with it on a daily basis.
Going it alone isn’t for everybody. If you have any doubts about your ability to dedicate the time and resources necessary to meet the stringent regulatory requirements of opening a new facility, you may want to bring on a consultant. But you’re going to pay for their services — somewhere around $30,000 for help throughout the process. In the end, it might turn out to be worth every penny. OSM
The American Association of Nurse Anesthesiology (AANA) has joined the ALL IN: Wellbeing First for Healthcare coalition, saying the group’s initiative to improve the...
Once you understand that being a perfectionist can be harmful to your personal outlook, health and anxiety level, you can unravel what to do about it....
The start of the year is a great time to clear the decks mentally and review for yourself what works and what does not....